Beginner’s Guide to Stabilizing and RV Leveling
Having an RV is the ultimate way to go on vacation and have all the comforts of home wherever you go. The convenience of being able to drive it just about anywhere you want, park up and enjoy your holiday creates a fantastic lifestyle. However, there can be times when you find yourself camping on uneven ground, so it’s important to understand RV leveling and how to do it.
That’s where this RVnGO RV leveling guide comes in handy – providing essential tips and advice on getting your RV set up right and being able to enjoy every bit of your holiday without worrying about its stability or comfort levels inside.
In this blog post, I’ll go over everything they need to know such as the importance of using stabilizers, how to use appropriate tools such as spirit levels or levelling blocks and even recommending safety precautions you should take when dealing with moving gears and wheel chocks. It also provides helpful suggestions for camping set-ups that take into account inclines, wind direction considerations and other factors.
Why Is Leveling an RV Important?
When it comes to camping in your RV, one of the most important things is being able to level it properly. A level RV allows for more comfort and avoids possible damage or malfunction of appliances. Even the smallest discrepancy can lead to problems with everyday activities such as eating, sleeping, and even using your refrigerator – especially if it’s of the older variety.
If your RV isn’t level when you park, you may find yourself having difficulty sleeping or adjusting positions. Items on tables or counters may also be prone to slipping off due to unsettling angles. Additionally, absorption refrigerators have a hard time running uphill, so an uneven surface can cause them to stall and result in food spoilage.
To ensure that all runs smoothly in your mobile home or travel trailer, and with no worries about potential repairs or replacements down the road due to appliance mishaps – make sure to take the time and hassle out of leveling your RV before everything else!
How to Manually Level an RV

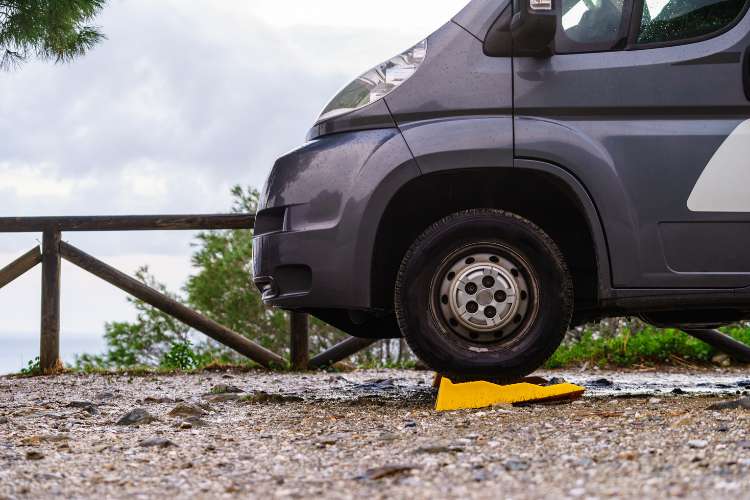
Whether you own a motorhome or a travel trailer, the basics of how to properly level an RV are essentially the same. First and foremost, you’ll need a bubble level to ensure that your RV is placed on even ground with no noticeable slants or slopes. Your next step is to prop up your wheels using blocks or other leveling materials until all four corners of the RV are at the same level using your bubble level.
Depending on what type of vehicle you have, there may be slight variations in strategy. For instance, an RVer with a class A motorhome will approach things differently than someone with a travel trailer. There may be significant differences in design between these two types of vehicles.
Before you begin leveling your RV, check to ensure that everything is in a secure place; nothing should move around when you push from one end of the vehicle to another. Once this is done and all potential hazards have been eliminated, slowly pour out sandbags or shims (depending on whether your reliance is more upon weight or accuracy) until each corner achieves its required height as per the measurements used by your bubble level. It’s important not to damage any utilities that connect near the leveling site by jacking up.
How to Level a Class B – C Vehicle
To do this, you will need to use a bubble level to measure the level of the RV on two different planes. Place the bubble level on a countertop, floor, or table close to the center of the motorhome and see if there are any discrepancies left-to-right or front-to-back.
Depending on how much balance your RV has lost, raising one corner of the home onto blocks may help restore it back to its previous balance. For example, if your RV is higher at the rear than it is in the front, then you would likely add blocks underneath the front corner of your motorhome. Once you have done this and driven your RV onto them before rechecking, you can be sure that everything is balanced and ready for use.
When using this system for leveling an RV, certain safety precautions should always be taken into consideration. Keep in mind that whatever type of blocking material you are using must be strong enough to support both the weight of your vehicle and any other items on board, such as cargo or people.
How to Level a Travel Trailer or Camper
Leveling a travel trailer can be a time-consuming process, but it’s essential to ensure your RV is safe and comfortable. The first step to leveling out your towable RV is to check the left-right balance, as you should first balance them before making any further adjustments.
To do this, you’ll need to set up blocks and wheel chocks on both sides of the tires to keep the vehicle from rolling away when unhitched from the tow vehicle. Once you’ve determined that your RV is properly leveled left to right, you can focus on its pitch by measuring front-to-back with a leveler or bubble gauge. This pitch is necessary for proper drainage; make sure that your RV’s pitch falls between 1/4” and 1/2” per foot – add or lower blocks if necessary.
Finally, with all adjustments in place, you should double-check all measurements (using a leveler or bubble gauge) and then unhitch your RV at last.
RV Leveling Technology and Auto-Leveling RVs
For RV lovers, the art of leveling — manually cranking up your RV and placing it properly to ensure the best use of your camping space — can be a challenge. However, with modern technology, you no longer need to dread this part of the traveling process. You can now add RV leveling technology, even auto-leveling systems, to many RVs with products available in the RV Aftermarket.
The Lippert system offers several options in a range of price points. The Power Tongue Jack alleviates manual cranking and lets you level your rig quickly and easily at the push of a button. For those looking for even more convenience, their Smart Jack™ adds memory for hitch height and automatically extends or retracts to its original setting without needing to manually adjust the jack. This makes thing quick and easy while still giving you accurate results each time.
How to Auto-level an RV
If you own an RV with an auto-leveling system, you have the advantage of an easier setup time when parking. Once you’ve found a spot to park your vehicle, you can simply press the auto-leveling button and let the system take care of adjusting your RV accordingly. You don’t have to worry about taking out specific devices or extending certain sides out, as it all happens automatically; just read the instructions from your RV owner’s manual and follow them. With an auto-leveling system, all that is required of you is to make sure that it is properly precise for a comfortable stay inside your RV.
When searching through RVs for sale, consider investing in one with an auto-leveling system. Not only do they adjust the height of either side without any difficult manual labor, they ensure a level position on uneven grounds, simplifying the parking process and reducing potential wear and tear on your recreational vehicle or camper van. This allows for less stress and adds enjoyment to any camping holiday trip by eliminating some parts of prepping up before actually going on one!
Rent Your Next RV with RVnGO Today!
Whether looking for an RV to go camping, fishing, or to go to your favorite music festival, RVnGO has your back with a wide selection of RVs for rent near you. Simply create an account at RVnGO.com today and get start planning your next RV vacation. With 24/7 roadside support, fantastic insurance coverage, and even the option for buy-now-pay-later payment plans, RVnGO is your one-stop RV rental platform. Connect to real RV owners and hosts near you and reserve your RV rental today at RVnGO.